- Get link
- X
- Other Apps
Cut a second piece of ribbon to the same length and set aside. Now this double-stranded thread must be inserted into the needle eye.
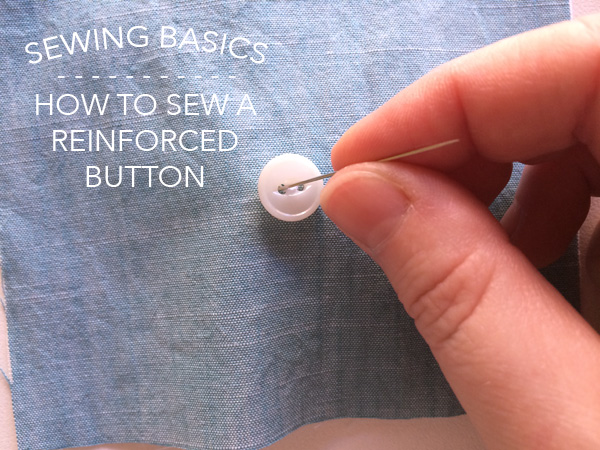
 Sewing Basics How To Sew A Reinforced Button
Position buttonholes so that their ends are where you want the buttons to sit.

How to sew a reinforced button. Fraying buttonhole threads not only make a garment look untidy but they also may lead to your buttons popping open at the slightest provocation. Now well mark the buttonhole side. Pull out from the spool about one meter of thread and fold it in half.
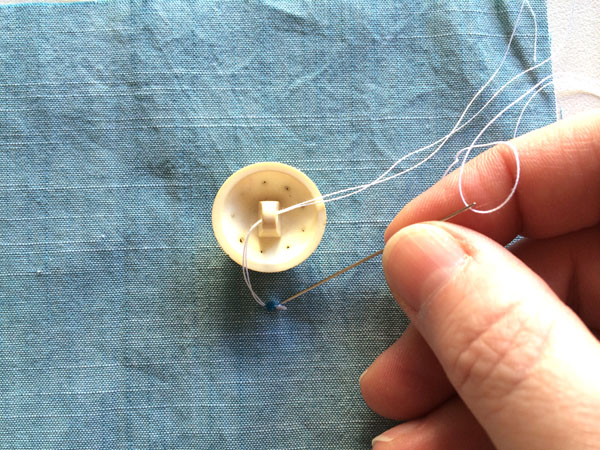
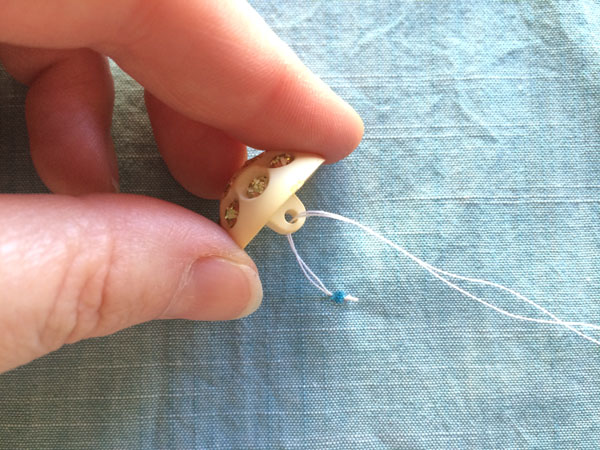
Pin the interfacing to the wrong side of your main fabric. Sew in straight stitch all around the edges of the bottom patch to keep the hole reinforced. At this point you want to add the spacer a second needle or a toothpick pin or small stick can be used.
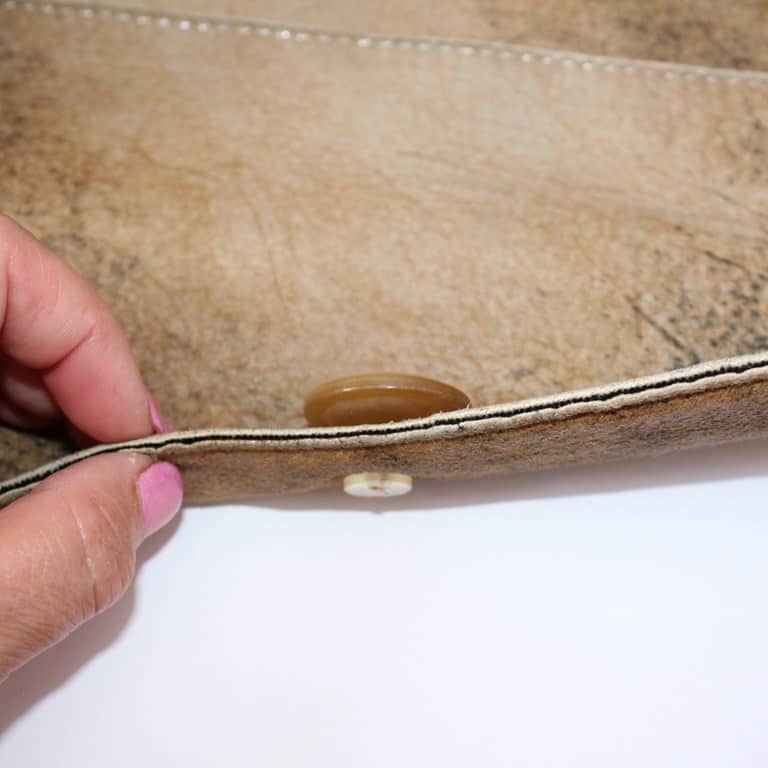
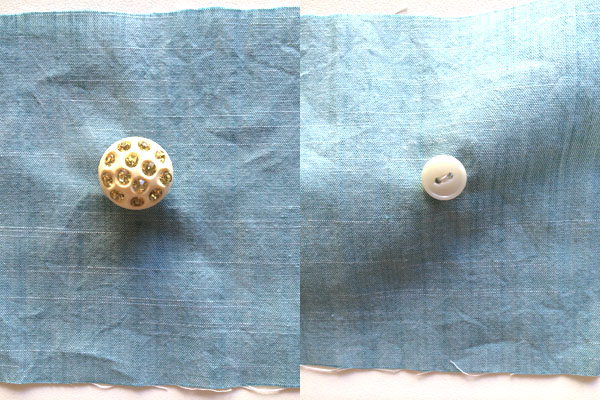
You can sew your buttonhole stitch with a doubled strand of good quality sewing thread that matches the fabric but for better visibility this example shows contrasting embroidery thread. For extra strength a small reinforcement button can be sewn onto the back of a button. Cut the interfacing fabric according to your pattern so that you have a piece of interfacing for each pattern piece.
Mark button placement on the appropriate band with contrasting yarn or safety pins before you work the buttonholes. Align the strip raw edges together to the neckline edge right sides together. Make two or three stitches in the fabric without the button to anchor your thread keeping the stitches in the area under where the button will be located.
You dont need a fancy sewing machine with a buttonhole feature to fix this problem. Cut off the extra thread and voila. Looking at the back of your fabric tie two knots with your remaining thread through the knot in the back.
Put the button on the anchor X and begin sewing by pushing the needle from the back to the front through the first button hole. On the opposite band work the buttonholes to correspond to the button markers. Cover with the top patch.
When the button is worn and hanging by a thread Ive always cut the whole business off and re-sewn it all back on. Push the needle up from the underside of the garment and through one of the holes on the button. Locate where you will be sewing the button on to the garment.
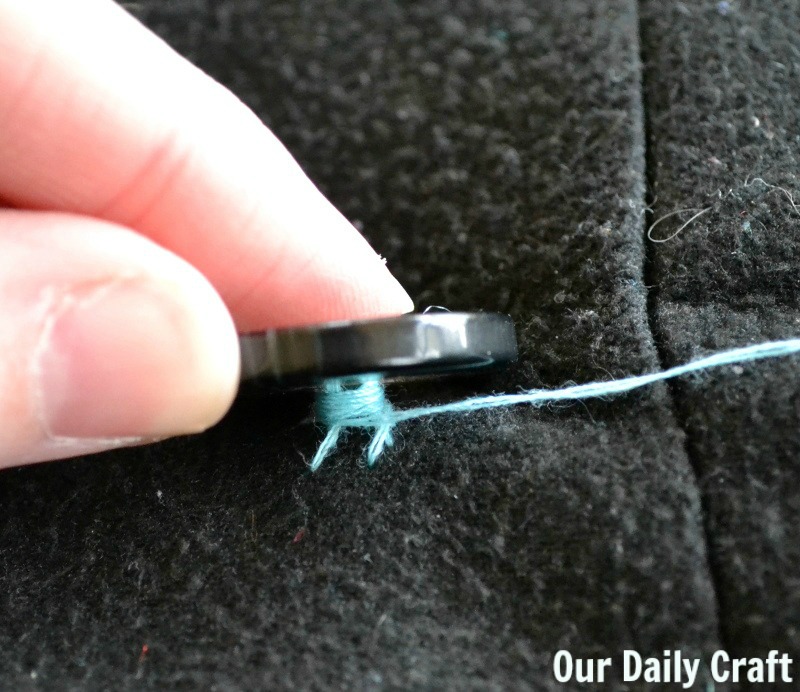
The coat button has a thread shank on the front to allow for the thickness of the coat. Place the needle into the fabric starting at the backside of the garment bringing it up through the garment. The width of this strip should be 2 12 inch.
To sew on the large buttons you need to use medium sized of hand needles. Buttonholes are usually reinforced with interfacing andor a double layer of fabric. Measure the length of the fabric edge and cut a strip to that length plus 1 -2 inch.
Hand-sew with matching thread applique style onto the top of the garment. Those backingreinforcing buttons have always been plain usually around 58 and had four holes just like the type seen on mens pants. Stitch along the edge.
Lets learn how to sew a reinforced button. In this example two same-sized buttons are sewn onto the Mary Q dre. If you position the middle of them where you want the buttons to sit the buttons will slide to the end of the buttonholes anyway once any stress is applied and the buttons ends up off-centre.
The unmarked ribbon will be used to back the button side of the cardigan. If you are using fusible interfacing iron the two fabrics together and remove the pins when the two fabrics. Follow these steps to do a simple dressmakers buttonhole stitch.
Place the folded-edge side down onto the fabric so it completely covers all the machine stitching. Buttons are usually placed on the left side for women and the right side for men. Work the thread around it several times for strength.
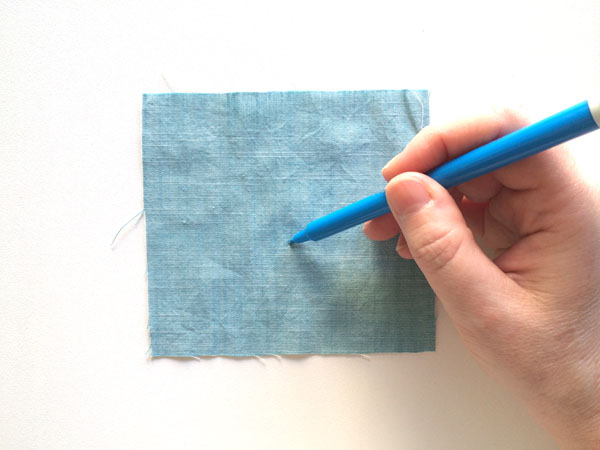
Match the length of your ribbon to the length of the knit band and add an extra inch or so to each side enough that you can fold it under to make a neat edge as seen above. Using a water soluble marking tool mark on the right side of the fabric where you want your button to go. Fold this strip by half length wise wrong side together.
Tie the all four ends with a knot. Make sure that you use enough buttons to prevent the band from gapping.

 Sewing Basics How To Sew A Reinforced Button
 Sewing Basics How To Sew A Reinforced Button
 How To Make A Perfect Hand Sewn Buttonhole Sew Guide
 Sewing Basics How To Sew A Reinforced Button
:max_bytes(150000):strip_icc()/ButtonholeStitch10-c09c7e4dd2e246fdb4d8bbb2c9667807.jpg) How To Do Buttonhole Stitch
How To Do Buttonhole Stitch
 How To Sew On A Button
 Sewing Tips How To Sew A Partial Button Placket Sewing Hacks Sewing For Beginners Beginner Sewing Projects Easy
 Simple Fixes And Mending Techniques Threads
 Making Buttonholes By Hand By Gum By Golly
 Sewing Basics How To Sew A Reinforced Button
Sew A Reinforced Button Youtube
 Sewing Basics How To Sew A Reinforced Button
Comments
Post a Comment